Cygwin Installation
The Cygwin toolkit provides Unix tools on the Windows platform. You need only install the Cygwin toolkit if you are rebuilding from source under Windows and intend to develop your own actors using Java using third party Java packages.
Rather than installing Cygwin, it may be easier to follow the
Eclipse
instructions and use the
$PTII/.classpath.default.
An alternative way to rebuild from sources on all platforms is
to use Apache ant, which requires neither Cygwin nor Apache.
See
ant $PTII/doc/coding/
and $PTII/build.default.xml.
Under Windows, the reason to install the Cygwin toolkit is so
that ./configure may be run and packages like Java
3D found in your environment.
The $PTII/.classpath.default file refers only to
resources included in the Ptolemy II download and does not refer
to other packages such as Java 3D for Windows. Eclipse users
who are using third party packages will need configure the
Eclipse build path by hand.
Note that compile your own actors, you will also need the
javac compiler. The javac compiler
is part of the JDK, which is available at:
http://www.oracle.com/technetwork/java/javase/downloads/index.html.
The javac compiler is not present in the
Java Runtime Environment (JRE)
The Cygwin home page is at
http://www.sourceware.org/cygwin/
Complete installation instructions can be found at
https://cygwin.com/install.html.
Compiling the Ptolemy II Matlab interface and Java Native Interface (JNI) actor requires that the a C compiler be installed. The Matlab interface requires that Matlab be installed on the local machine.
Under Windows, to build the Matlab interface, it may be necessary to use MinGW from http://www.mingw.org. Recent versions of Cygwin seem to include what is necessary, so if you are building the Matlab interface, try Cygwin first and if that does not work, try installing MinGW separately.
Contents
- Cygwin Installation instructions
- Problems and solutions
Cygwin Installation instructions
- Download the Cygwin setup from https://cygwin.com/install.html. Note that there are two versions, one for 32-bit, the other for 64-bit. Most versions of Windows are 64-bit.
See 32-bit or 64-bit for details.
The instructions below assume 64-bit. - Double click on the setup executable that was downloaded.
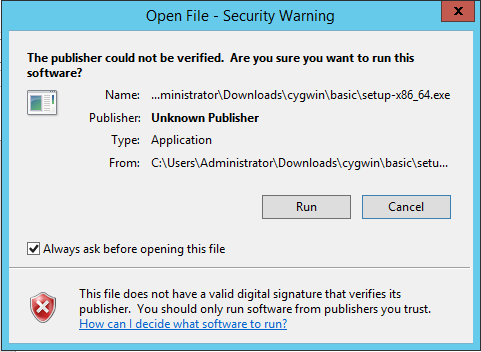
- In the "Open File - Security Warning" window, click Run.
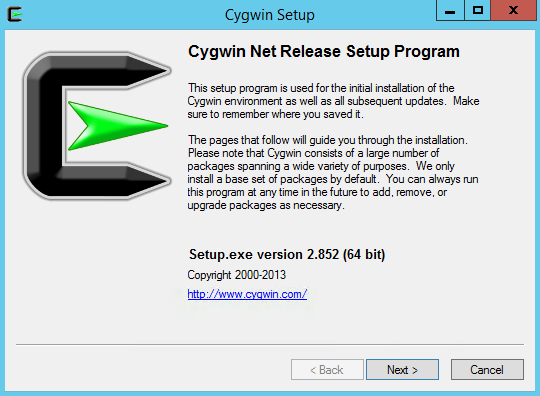
- In the "Cygwin Net Release Setup Program" window, click Next.
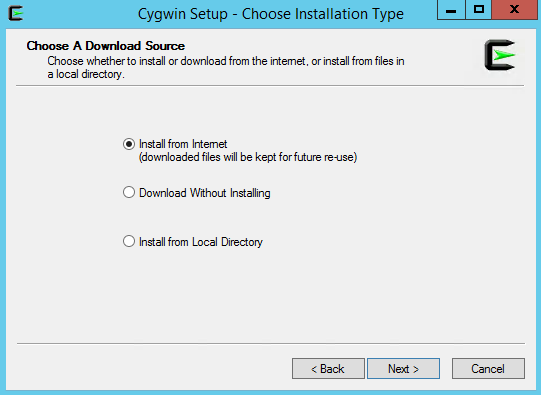
- In the "Cygwin Setup - Choose Installation Type" window, keep the default of Install from Internet. and click Next.
- In the "Cygwin Setup - Choose Installation Directory" window, keep the default Root Directory
C:\cygwin64and Install for All Users, click Next.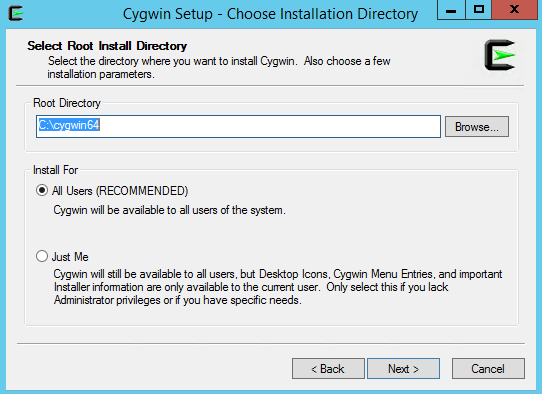
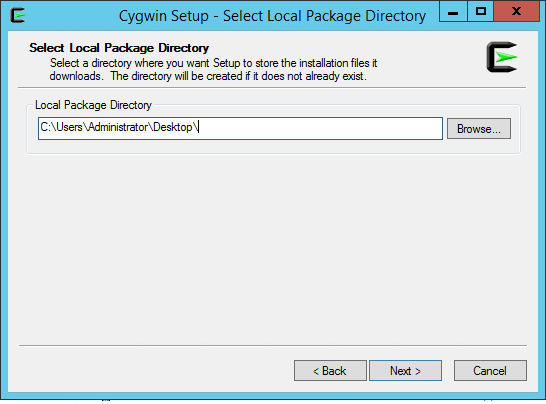
- In the "Cygwin Setup - Choose Local Package Directory" window, keep the default and click Next.
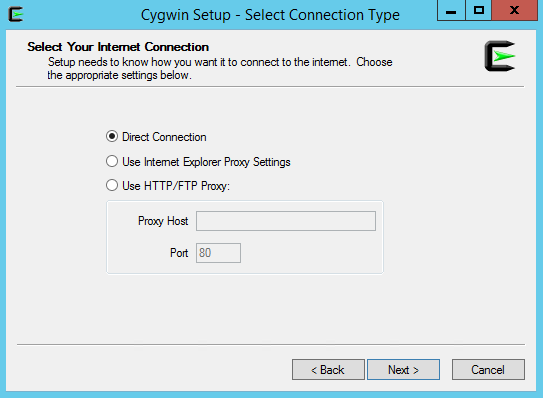
- In the "Cygwin Setup - Select Connection Type" window, keep the defaults and click Next.
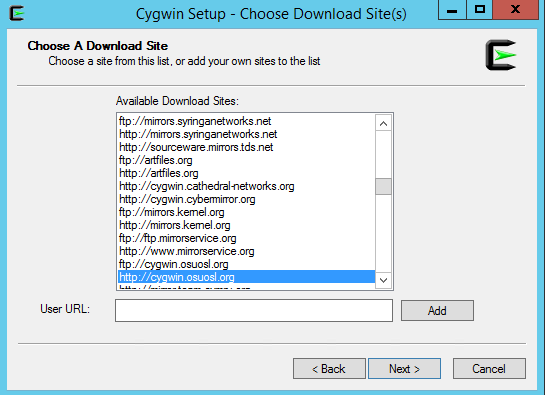
- In the "Cygwin Setup - Choose Download Site(s)" window, select a nearby download site and click Next.
- Finally, the "Cygwin Setup - Select Packages" window comes up! This window is populated with a default set of packages to download. The "View" button on the upper right toggles through different views.
Click on the "View" button until Full is displayed. (The window below was resized so as to better fit the screen. Your view may vary.)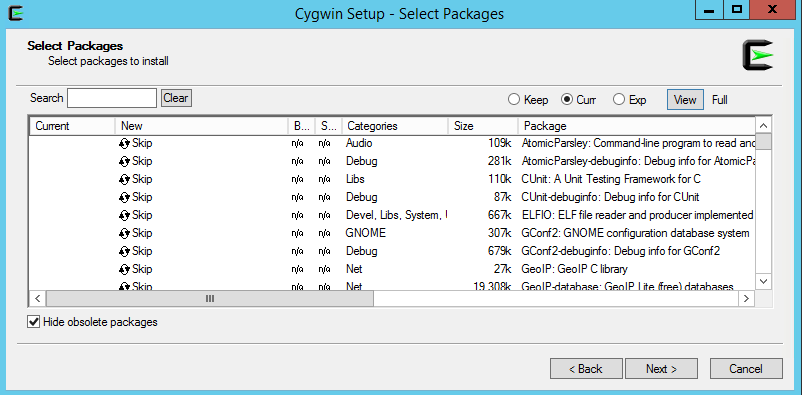
- The next steps are to add a number of packages by typing
the name of each of the packages below into the Search window fo
the "Cygwin Setup - Select Packages" Window and then click on
the "Skip" icon until the version number is displayed.
In the window below,gcc-corehas been entered in to the Search window and two packages have been selected.
For each of the packages listed below, enter the package name into the Search window, and then click on the Skip icon until a version number is displayed (The version numbers that were present in November, 2014 are shown, more recent runs of setup will have later versions):- diffutils 3.3-2
- make 4.0-2
- subversion 1.8.10-2
- autoconf 13-1 (Used to update $PTII/configure)
- automake 1.14.1-1 (Used by Viptos)
- binutils 2.24-51.6
- bison 3.0.2-1 (Used by Viptos)
- emacs 24.4-2 (Used by Viptos)
- emacs-el 24.4-2 (Used by Viptos)
- gcc-core 4.8.3-5. Select gcc-core and mingw64-x86_64-gcc-core 4.8.3-5 (Used by Matlab)
- gcc-g++ 4.8.3-5. Also select mingw64-x86_64-gcc-g++ 4.8.2-1 (Used by Matlab)
- gperf 3.0.4-2 (Used by Viptos)
- libexpat-devel 2.1.0-3 (Used by BCVTB in $PTII/lbnl)
- rpm 4.11.1-1 (Used by Viptos)
- unzip (Used by FMI)
- zip (Used by FMI)
- In the "Cygwin Setup - Select Packages" window, click Next.
- In the "Cygwin Setup - Resolving Dependencies" window, click Next.
- The download and installation will proceed
- In the "Cygwin Setup - Installation Status and Create Icons" window, select Create icons on the Desktop and Add icon to Start Menu, then hit Finish.
-
c:/cygwin64/etc/passwdis created during the Cygwin installation. If your Windows account is a domain account and not a local account, then you may need to add an entry toc:/cygwin64/etc/passwdby hand.
To do this, start up the Cygwin bash shell by clicking on the Bash icon.
Then use themkpasswdcommand to append a line with your login information, for example, user "cxh" used:mkpasswd -l > /etc/passwd mkpasswd -d -u cxh --path-to-home=/cygdrive/c/users >> /etc/passwd
mkpasswd -hwill print out help for themkpasswdcommand - Follow the instructions in the
Set the value of the
PTIIenvironment variable section
Problems and solutions
$'\r': command not found
The problem is that shell scripts such as
$PTII/bin/vergil may fail:
	  $ export PTII=c:/user/ptII
	  $ $PTII/bin/vergil
	  c:/user/ptII/bin/vergil: line 30: $'\r': command not found
	  c:/user/ptII/bin/vergil: line 40: $'\r': command not found
	  c:/user/ptII/bin/vergil: line 43: $'\r': command not found
	  c:/user/ptII/bin/vergil: line 48: $'\r': command not found
	  c:/user/ptII/bin/vergil: line 67: syntax error near unexpected token `$'in\r''
	  ':/user/ptII/bin/vergil: line 67: `    case "`uname -s`" in
The solution is to set bash to ignore carriage returns '\r',
Another possible solution is to create a ~/.bash_profile that contains
	    export SHELLOPTS
	    set -o igncr
To find your home directory, start up Cygwin bash and type
cd;pwd. Then use an editor like Wordpad.
See also:
-
http://cygwin.com/ml/cygwin-announce/2006-12/msg00026.html- The 2006 Cygwin announcement that covers this. - This problem is similar to the Cygwin CR/NL problems. What has changed is that the Cygwin installer appears to no longer offer the possibility of selecting DOS as the default file type.
http://comments.gmane.org/gmane.os.cygwin/115453- discussion about the issue.http://cygwin.com/cygwin-ug-net/using.html#using-pathnames- info about why paths likec:/do not use/etc/fstab.http://cygwin.com/cygwin-ug-net/using.html#mount-table- Cygwin manual for/etc/fstab.
Another possibility is to use perl to convert the \r\n characters to \n:
perl -i -pne "s/\r\n/\n/g" configure
*** target pattern contains no '%'. Stop.
The problem is that if $PTII contains a colon, such as
export PTII=c:/Users/Administrator/ptII
Then newer versions of GNU make will fail.
Under Windows, $PTII must be set using c: syntax because tools like
java do not understand /cygdrive/c
A workaround is to download cygwin-make-3.80.tar.gz:
	    cd /usr/bin
            wget https://ptolemy.berkeley.edu/ptolemyII/ptII11.0/cygwin-make-3.80.tar.gz
	    mv make.exe make.old.exe
	    tar -zxf cygwin-make-3.80.tar.gz
	    rm cygwin-make-3.80.tar.gz
See Bug 55 - GNU Make 3.81 is broken under Windows
Installing MinGW for Windows
In the past, the default gcc compiler shipped with Cygwin produced .dll files that did not work properly. The solution is to install Mingw.
MinGW may only be necessary if you are building the Matlab interface.
Installing from the MinGW website
- Install Cygwin either from http://www.cygwin.com or from the Ptolemy distribution.
- Start Cygwin bash, create c:\mingw
-
mkdir c:/mingw
	    cd c:/mingw
- Copy the mingwdl.sh script from http://www.mingw.org/wiki/HOWTO_Install_the_MinGW_GCC_Compiler_Suite and paste it into an editor and create c:/mingw/mingwdl.sh
- Execute mingwdl.sh, which will download the binaries into c:/mingwdl.
bash mingwdl.sh
- Unzip the .tar.gz files
gunzip *.gz
- Uncompress the .tar.lzma files:
lzma -d *.lzma
- untar the .tar files. Create a script called mingwuntar.sh:
#!/bin/sh
	    tars=`ls *.tar`
	    for tar in $tars
	    do
	    echo $tar
	    tar -xf $tar
	    done
- Run mingwuntar.sh
bash mingwuntar.sh
- Add c:\mingw\bin to your Windows path Based on the Mingw instructions:
- Right-click on "My Computer" and select "Properties".
- Click Advanced | Environment Variables.
- In the box entitled "System Variables" scroll down to the line that says "PATH" and double-click the entry.
- You will be presented with a dialog box with two text boxes, the bottom text box allows you to edit the PATH variable. It is very important that you do not delete the existing values in the PATH string, this will cause all sorts of problems for you!
- Scroll to the end of the string and at the end add ";C:\mingw\bin". Don't forget the semicolon; this separates the entries in the PATH.
- press OK | OK | OK and you are done.
Enabling Copy in Cygwin Bash under XP
You may need to enable copy and paste in the bash shell window.
If copy and paste are working properly, then you should be able to highlight text by left clicking and dragging the mouse over the text and then hitting the Enter key to copy the highlighted text.
The Cygwin faq at
https://www.cygwin.com/faq/faq.html#faq.using.copy-and-paste
says:
How can I copy and paste into Cygwin console windows?
First, consider using mintty instead of the standard console window. In mintty, selecting with the left-mouse also copies, and middle-mouse pastes. It couldn't be easier!
In Windows's console window, open the properties dialog. The options contain a toggle button, named "Quick edit mode". It must be ON. Save the properties.
You can also bind the insert key to paste from the clipboard by adding the following line to your .inputrc file:
"\e[2~": paste-from-clipboard
